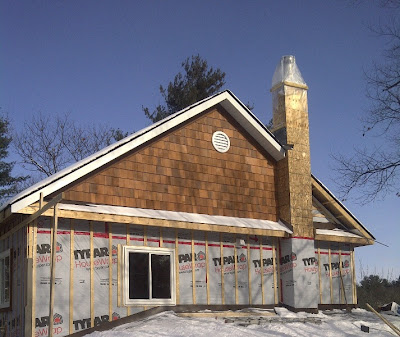
The cottage is now insulated
After a two week holiday our returned to work last Wednesday to complete the insulating of the cottage. On Friday we accomplished another major milestone by passing the "Insulation Inspection" from Severn Township's Building Department. This now allows us to proceed with the application of the wall covering.
A variety of material was used to insulate the cottage
1. Spray foam sound insulation - This is an open cell foam used on the main floor ceiling to reduce sound up to the bedrooms.
2. Spray foam insulation (purple below) - This is a closed cell foam with a R20 value which was used on the front window wall, around the outside perimeter of the main floor ceiling and under the master bedroom overhang.
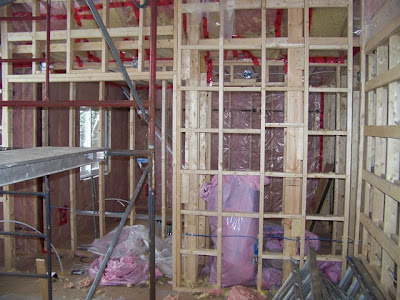
3. Blown insulation (white in both pictures below) - This is a loose fiberglass insulation blown in the flat ceiling to provide the R40 insulation required by the Building Code. The advantage of the blown insulation is that it fits into all cracks and openings providing a better R40 by minimising air leaks. The disadvantage is that a higher thickness is required to achieve R40 so it could not be used under the floor in the area of the attic to be used for storage, as the cavity was not thick enough for the blown insulation. Instead fiberglass (pink below) batts were used to give R40 under that floor as well
Note: The strapping in the pictures below is helping hold up the insulation but the real purpose is to provide support at 16' on centre for the drywall on the ceiling. The trusses were designed and installed at 24" on centre thus the strapping is meant to allow for a more even ceiling.
4. Fiberglass batts - Pink fiberglass batts were installed on all 2x6 vertical walls to provide R20 insulation on the walls. (Two layers of R20 under the attic floor). R32 batts were installed in the sloped ceiling of the Master bedroom ceiling as directed by the Building Code.
4. ROXUL Safe‘n’Sound™ was installed in the Master Bedroom and all the bathrooms wall cavities for sound insulation. It is a stone wool insulation product with excellent acoustical dampening properties.
5. Vapour Barrier - Notice the clear plastic and the red tape everywhere. The spray foam acts as it's own vapour barrier. The plastic is a vapour barrier which has to be installed on the warm side of the insulation. The red tape is to seal the edges and joints of the vapour barrier, around electrical outlets, etc., to prevent air leakage.
Even though the Building Code is not very clear concerning the sealing of holes drilled to feed wires through the framing, we caulked all holes as shown below
The walls below in the Master Bedroom and in the 2nd floor hallway all had to be strapped horizontally to accommodate the vertical pine wall covering.
The drywall is the next item to be completed. The installer have been in to take measurements. The material will be delivered later this week and they will begin installation next week.
The pine for the walls, ceilings and trim has all been ordered. The supplier is preparing some samples of the actual colour for final confirmation before the material goes to the paint shop. It will take 2-3 weeks before it is delivered, and it will need two weeks to acclimatize to the cottage before it can be installed
The stone mason was able to do some work over the holidays and he has the fireplace all framed in and he has some of the stone installed as can be seen below. We also received the WETT certification for the fireplace as required by the Building Code.
He has also taken advantage of the warmer temperature to work on the outside stone on the front of the cottage. As can be seen below he has the area all enclosed and a propane heater is keeping him warm and allows the mortar to dry and cure.
The picture below shows Jon installing the plywood in the kitchen which is needed for the installation of the kitchen cabinets later this spring.
The interior work for our crew was completed last week, and they will now have to wait for the drywall to be installed and taped and primed and for the pine to acclimatize before they return inside. In the meantime they will be working outside installing the wood siding.


